
Universal casters are a great aid in moving furniture, equipment, and carts, but sometimes we need to remove them for replacement, maintenance, or repair. Whether you’re dealing with office chairs, furniture, industrial carts, or medical equipment, knowing how to properly remove and install universal wheels is an essential skill that can save you time and money. In this comprehensive guide, we will detail how to remove and install universal wheels of various types, providing step-by-step instructions, safety tips, and troubleshooting advice so that you can easily cope with this task.
Prepare the Necessary Tools and Materials
Before beginning any caster removal or installation project, it’s essential to gather the right tools and materials. Having everything prepared beforehand ensures a smooth, efficient process and prevents mid-project delays.
Essential tools for universal wheel removal and installation:
- Needle-nose pliers (sharp-nosed vise): The key tool for prying open retaining rings and gripping small components. Choose pliers with comfortable grips and precise tips for working in tight spaces.
- Flat-head screwdriver: Useful for prying, lifting, and separating components. A medium-sized screwdriver (6-8mm tip) works best for most caster applications.
- Phillips-head screwdriver: Required for plate-mounted casters that attach with screws. Have both #2 and #3 sizes available.
- Adjustable wrench: For threaded stem casters and nut-and-bolt installations. A 6-8 inch adjustable wrench covers most common sizes.
- Rubber mallet or hammer: For gently tapping wheels into place or loosening stubborn components. A rubber mallet is preferred to avoid damaging surfaces.
- Cleaning cloth and mild detergent: For cleaning mounting surfaces and removing dirt, grease, and debris before installation.
- Lubricant (silicone spray or WD-40): For loosening rusted or seized components and lubricating moving parts after installation.
- Safety glasses and work gloves: Essential personal protective equipment to prevent eye injuries from flying debris and hand injuries from sharp edges.
Replacement universal wheels: Ensure you purchase the correct type and size for your application. Measure the existing caster’s wheel diameter (typically 50mm-200mm), stem diameter (if stem-mounted), or plate dimensions (if plate-mounted). It’s recommended to buy a few extra spares at once, as having replacements on hand saves time when future maintenance is needed.
Identify Your Caster Mounting Type
Before attempting removal, it’s crucial to identify which type of caster mounting system you’re working with, as each requires a different removal and installation approach. Universal wheels typically come in four main mounting types:
| Mounting Type | Description | Common Applications | Removal Method |
|---|---|---|---|
| Grip Ring Stem | Metal stem with a spring-loaded retaining ring that expands inside the mounting hole | Office chairs, furniture, medical carts, light equipment | Pry off retaining ring, pull stem straight out |
| Threaded Stem | Stem with external threads that screw into a threaded insert or nut | Furniture, display racks, medium-duty carts | Unscrew counterclockwise with wrench or pliers |
| Top Plate Mount | Flat metal plate with 4 screw holes that bolts to the bottom of equipment | Industrial carts, heavy equipment, workbenches, hospital beds | Remove 4 mounting screws/nuts, lift plate off |
| Grip Neck Stem | Smooth stem with a collar that fits into a square mounting hole | Kitchen equipment, restaurant carts, some furniture | Pull straight out (friction fit), may require tapping from behind |
To identify your caster type, simply examine how it attaches to the furniture or equipment. If you’re unsure, take a photo and consult the manufacturer’s documentation or a knowledgeable caster supplier for guidance.
Removal Process for Grip Ring Stem Casters
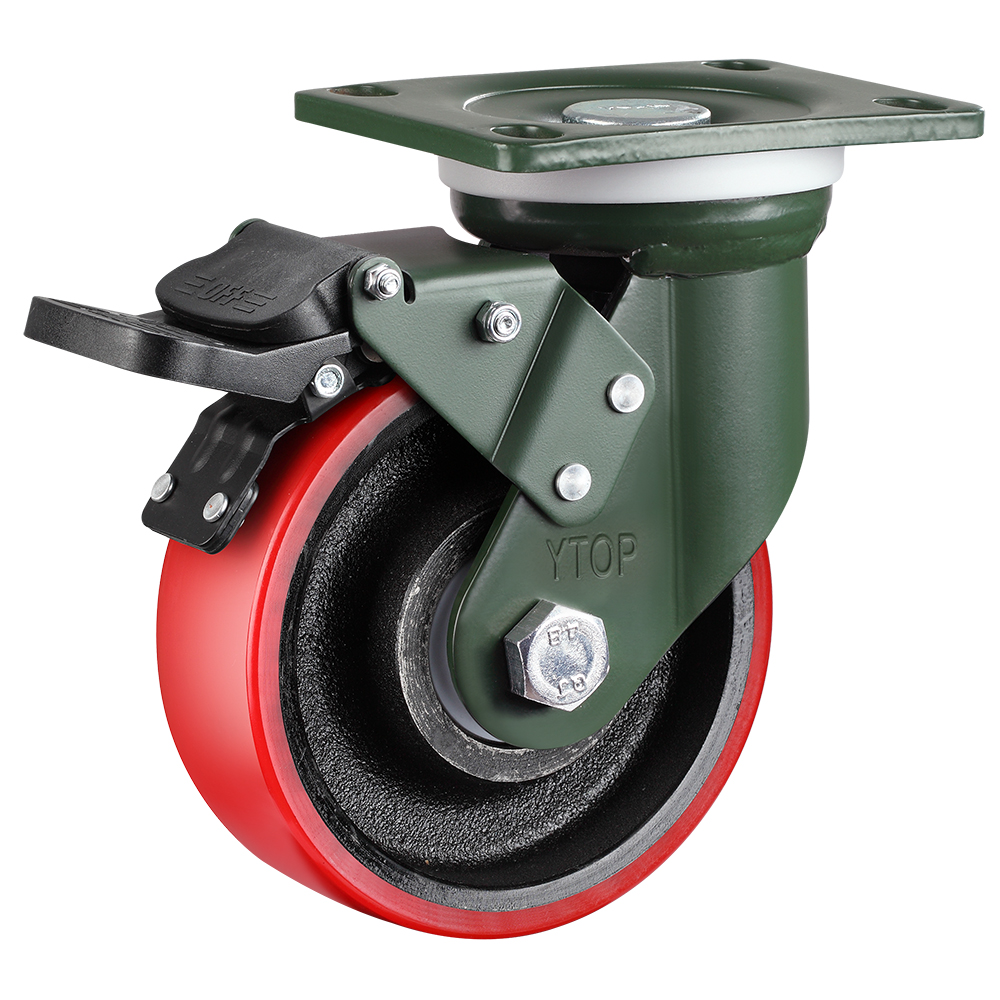
Grip ring stem casters are the most common type found on office chairs and furniture. Follow these steps for safe and effective removal:
- Prepare the workspace: Turn the chair or furniture upside down or on its side so the casters are accessible. Ensure the surface is stable and won’t tip over during the process. Place a towel or blanket underneath to protect the floor and furniture finish.
- Inspect the caster stem: Look at the base of the caster where the stem enters the mounting hole. You should see a metal retaining ring (also called a grip ring or circlip) that sits in a groove around the stem.
- Pry open the wheel interface: Use your needle-nose pliers to carefully pry open the retaining ring. Insert one tip of the pliers under the ring and gently lift it out of its groove. Work your way around the ring until it’s fully expanded and free from the groove. This process may require some force, so if you can’t pry it off at once, don’t rush—find a solid pivot point and continue prying gradually.
- Complete the removal process: Once the retaining ring is loose, grip the caster wheel firmly and pull it straight out of the mounting hole. If it’s stuck, gently wiggle it from side to side while pulling. You can also use the pliers to grip the stem base and pull. Be careful with this step so that you don’t damage the mounting hole, the retaining ring, or cause other problems.
- Remove the retaining ring from the stem: If the retaining ring is still attached to the old caster, remove it and keep it if it’s in good condition. If it’s bent, stretched, or damaged, discard it and use a new retaining ring with the replacement caster.
Safety tip: Always wear safety glasses when prying retaining rings, as they can suddenly pop loose and fly through the air with significant force. Keep your face away from the caster during the prying process.
Removal Process for Threaded Stem Casters
Threaded stem casters screw into a threaded insert or nut embedded in the furniture leg. Removal is generally simpler than grip ring casters:
- Prepare the workspace: As with grip ring casters, turn the furniture upside down or on its side for easy access.
- Grip the caster stem: Use your adjustable wrench or pliers to grip the base of the caster stem where it meets the mounting surface. If the caster has a hexagonal base, use an appropriately sized wrench for a secure grip.
- Turn counterclockwise: Rotate the caster counterclockwise to unscrew it from the threaded insert. Apply steady, even pressure—don’t force it if it’s stuck, as this can strip the threads.
- Loosen stubborn casters: If the caster is rusted or seized, apply a small amount of penetrating oil (such as WD-40) to the threads and let it sit for 10-15 minutes before attempting removal again. You can also gently tap the caster base with a rubber mallet to break loose rust or corrosion.
- Inspect the threads: Once removed, inspect the threads on both the caster stem and the mounting insert for damage, stripping, or corrosion. If the insert is damaged, it may need to be replaced before installing a new caster.
Removal Process for Top Plate Mount Casters
Top plate mount casters are commonly found on industrial carts, heavy equipment, and workbenches. They attach with four screws or bolts:
- Prepare the workspace: For heavy equipment, use a jack or lift to raise the equipment slightly, or have an assistant help tilt it. Never work under heavy equipment without proper support.
- Locate the mounting fasteners: Look at the top plate where it attaches to the equipment. You’ll typically find four screws or bolts, one at each corner of the plate.
- Remove the fasteners: Use the appropriate screwdriver or wrench to remove all four mounting screws or nuts. Turn them counterclockwise until they’re fully removed. Keep the fasteners in a safe place—you’ll need them for installation if they’re in good condition.
- Lift the caster off: Once all fasteners are removed, lift the caster plate straight off the mounting surface. If it’s stuck due to rust or paint, gently pry it loose with a flat-head screwdriver, being careful not to damage the mounting surface.
- Clean the mounting surface: Use a wire brush or cleaning cloth to remove rust, paint, dirt, and debris from the mounting surface. This ensures a clean, flat surface for the new caster installation.
Clean the Interface and Prepare for Installation
Once you have successfully removed the old caster, take the time to properly clean and prepare the mounting interface before installing the new wheel. This crucial step ensures a secure, long-lasting installation and prevents premature wear or failure.
Cleaning steps for all caster types:
- Remove dust and debris: Use a clean cloth or compressed air to remove dust, dirt, hair, and debris from the mounting hole, threads, or plate surface.
- Remove rust and corrosion: For metal surfaces, use a wire brush or sandpaper to remove light rust and corrosion. For heavier rust, apply a rust converter or penetrating oil and let it sit before scrubbing.
- Clean with mild detergent: Wipe the surface with a cloth dampened with mild detergent and water to remove grease, oil, and stubborn dirt. Dry thoroughly with a clean cloth.
- Inspect for damage: Examine the mounting surface for cracks, stripped threads, elongated holes, or other damage. If the mounting surface is damaged, repair it before installation or consult a professional for advice.
- Apply lubricant if needed: For threaded stem casters, apply a small amount of anti-seize compound or lubricant to the threads to prevent future seizing and make future removal easier.
Proper cleaning and preparation can significantly extend the life of your new casters and ensure smooth, trouble-free operation.
Install the New Universal Wheel
With the old caster removed and the mounting surface cleaned, you’re ready to install the new universal wheel. The installation process varies depending on the caster mounting type:
For grip ring stem casters:
- Ensure the retaining ring is properly seated in the groove on the new caster stem. If it’s not already installed, place it in the groove and press it into place.
- Align the stem with the mounting hole on the furniture leg.
- Press the stem firmly into the hole. The retaining ring will compress as it enters the hole and expand once it reaches the internal groove, locking the caster in place.
- If you can’t press it in by hand, sit on it and press it down with your weight, or use a rubber mallet to gently tap it into place. This will ensure that the wheel is firmly installed in the interface.
- Give the caster a firm tug to confirm it’s securely locked in place.
For threaded stem casters:
- Align the threaded stem with the threaded insert in the furniture leg.
- Turn the caster clockwise by hand to start the threads. Be careful to start straight—cross-threading can damage both the caster and the insert.
- Once the threads are engaged, use a wrench or pliers to tighten the caster firmly. Don’t overtighten—snug is sufficient, as overtightening can strip threads or crack the mounting insert.
- Test the caster by rotating it and ensuring it swivels freely.
For top plate mount casters:
- Position the new caster plate over the mounting holes on the equipment.
- Insert the mounting screws or bolts through the plate holes and into the equipment.
- Tighten each fastener by hand first, then use a screwdriver or wrench to tighten them fully. Tighten in a crisscross pattern (like tightening lug nuts on a car) to ensure even pressure and prevent warping.
- Ensure all four fasteners are securely tightened and the plate is flush against the mounting surface.
Post-installation check: After installing all casters, test the furniture or equipment by rolling it around on a flat surface. Check for smooth rolling, proper swiveling, and any wobbling or instability. If a caster feels loose or wobbly, remove it and reinstall it, ensuring it’s properly seated and tightened.
Troubleshooting Common Problems
Even with careful preparation, you may encounter issues during caster removal or installation. Here are solutions to common problems:
Problem: The retaining ring won’t pry loose.
Solution: Apply a small amount of penetrating oil to the ring and let it sit for 10-15 minutes. Use a small flat-head screwdriver to work the ring loose from one end, then gradually work your way around. If the ring is severely corroded, you may need to cut it off with a rotary tool and use a new ring with the replacement caster.
Problem: The caster stem is stuck and won’t pull out.
Solution: Apply penetrating oil to the stem and let it soak. Gently wiggle the caster from side to side while pulling. For grip neck stems, you can tap the stem from behind (if accessible) with a hammer and punch. Never use excessive force that could damage the mounting hole or furniture.
Problem: Threads are stripped or cross-threaded.
Solution: If the caster stem threads are stripped, replace the caster. If the mounting insert threads are stripped, you may be able to install a larger threaded insert (helical coil or solid bushing) to restore the threads. For severe damage, consult a professional repair service.
Problem: The new caster doesn’t fit the mounting hole.
Solution: Double-check the caster specifications—stem diameter, stem length, and grip ring groove position must match the original. If the hole is slightly oversized, you can use a caster with a larger diameter stem or install a reducing bushing. Never force a caster that doesn’t fit, as this can damage the furniture.
Problem: Caster squeaks or doesn’t roll smoothly after installation.
Solution: Apply a small amount of silicone lubricant to the wheel bearings and swivel raceway. Check that the axle bolt isn’t overtightened—there should be a small amount of play for smooth rotation. If the squeaking persists, the wheel bearings may be defective and the caster should be replaced.
Problem: Furniture wobbles after caster replacement.
Solution: Ensure all casters are the same height and type. Mixing different wheel diameters or caster types can cause wobbling. Check that all casters are securely installed and tightened. If the floor is uneven, consider using leveling casters or placing shims under the shorter legs.
Maintenance Tips to Extend Caster Life
Proper maintenance can significantly extend the life of your universal wheels and ensure smooth, safe operation. Follow these maintenance tips:
- Regular cleaning: Wipe caster wheels and mounting surfaces monthly to remove dirt, hair, and debris that can accumulate and impede movement. Use a damp cloth and mild detergent, then dry thoroughly.
- Lubrication: Lubricate wheel bearings and swivel raceways every 3-6 months with silicone spray or light machine oil. This prevents squeaking, reduces friction, and extends bearing life.
- Inspection: Periodically inspect casters for wear, cracks, flat spots, or damage to wheels. Check that mounting fasteners are tight and that retaining rings are properly seated. Replace any damaged or worn casters promptly.
- Load management: Never exceed the rated load capacity of your casters. Overloading causes premature wear, wheel deformation, and potential catastrophic failure. Distribute loads evenly across all casters.
- Floor maintenance: Keep floors clean and free of debris, sharp objects, and spills that could damage caster wheels or create safety hazards. Smooth, clean floors reduce caster wear and rolling resistance.
- Proper storage: When storing equipment for extended periods, lift it off the casters or place it on blocks to prevent flat-spotting of wheels. Store in a cool, dry environment to prevent corrosion.
- Replacement schedule: Even with good maintenance, casters wear out over time. Plan to replace casters every 2-5 years depending on usage frequency, load conditions, and environment. Replace all casters on a piece of equipment at the same time for even wear and stability.
FAQs About Universal Wheel Removal and Installation
Q: Can I replace just the wheel without replacing the entire caster?
A: In many cases, yes. If the caster rig (stem or plate, fork, and swivel raceway) is still in good condition, you can often replace just the wheel by removing the axle bolt or rivet. However, for grip ring stem casters on office chairs, it’s usually more cost-effective and easier to replace the entire caster assembly, as the cost difference is minimal and you get fresh bearings and swivel mechanism.
Q: How do I know what size caster to buy?
A: Measure the existing caster’s wheel diameter (across the wheel), wheel width, and stem diameter (if stem-mounted) or plate dimensions (if plate-mounted). For grip ring stems, also measure the stem length and grip ring groove position. Most caster suppliers provide detailed specification sheets—match your measurements to the specifications. When in doubt, bring the old caster to a supplier for matching.
Q: Is it safe to use a higher load capacity caster than the original?
A: Yes, using a higher load capacity caster is generally safe and can even improve durability. However, ensure that the mounting dimensions match and that the larger caster doesn’t interfere with the equipment’s operation or ground clearance. Using significantly larger wheels may change the height of the equipment and cause instability.
Q: Can I install casters on furniture that didn’t originally have them?
A: Yes, you can add casters to most furniture and equipment, but it requires careful planning. You’ll need to install mounting plates or threaded inserts on the bottom of the legs, ensure the structure can support the casters and loads, and choose casters with appropriate load capacity. For heavy or tall furniture, consider using at least two locking casters for stability. If you’re unsure, consult a professional or the furniture manufacturer.
Q: Why do my new casters squeak?
A: Squeaking is usually caused by dry bearings or swivel raceways. Apply a small amount of silicone lubricant or WD-40 to the wheel axle and swivel mechanism. If the squeaking persists after lubrication, the bearings may be defective or improperly installed, and the caster should be replaced.
Q: How tight should caster mounting screws be?
A: Tighten mounting screws until the plate is firmly seated and flush against the mounting surface. Use a crisscross tightening pattern to ensure even pressure. Don’t overtighten, as this can strip screw holes, warp the plate, or crack the mounting surface. For most applications, “snug plus a quarter turn” is appropriate.
Q: Can I mix locking and non-locking casters on the same piece of equipment?
A: Yes, mixing locking and non-locking casters is common and recommended for many applications. A typical configuration is two locking casters at one end and two non-locking casters at the other, which provides stability when locked while maintaining maneuverability. For maximum stability, place locking casters at the end where loading/unloading occurs or where the operator stands.
Conclusion
By following the steps outlined in this comprehensive guide, you can easily remove and install universal wheels of various types, from common grip ring stem casters on office chairs to heavy-duty top plate mount casters on industrial equipment. The key to success is proper preparation, using the right tools, identifying your caster mounting type, and following the appropriate removal and installation procedures carefully.
Please note that there may be differences between different brands and models of casters, so you may need to adjust the method in actual operation. Always consult the manufacturer’s instructions when available, and if you encounter problems during operation that you’re not comfortable handling, it’s recommended to consult a professional or the manufacturer rather than forcing a solution that could cause damage.
With proper installation and regular maintenance, your new universal wheels will provide years of smooth, reliable service, making your furniture and equipment easier to move and more versatile in any environment.
At YTOP Casters, we offer a comprehensive range of universal wheels and light-duty casters for furniture and office applications, medium-duty casters for carts and displays, and heavy-duty casters for industrial equipment. All our casters are available with grip ring stems, threaded stems, or top plate mounts to suit any application. With 15 years of manufacturing experience and ISO/CE certification, our caster wheels deliver the quality and reliability you can trust. Contact our team for expert guidance on selecting the perfect caster solution for your specific needs.
Related Reading
Looking for more in-depth caster guides and industrial mobility resources? Explore these related articles:

- Heavy-Duty Casters Selection Guide — Learn how to select the right heavy-duty casters for your equipment, including load calculation, material selection, and braking systems.
- Extra Heavy Duty Casters: Full Analysis — An in-depth look at extra heavy duty casters, including features, load capacity specifications, structural design, and industry applications.
- PP vs TPR Casters: A Complete Comparison Guide — Understand the key differences between polypropylene and thermoplastic rubber caster wheels for industrial applications.
- Rubber vs Nylon Casters: Which is Right for You? — A detailed comparison of rubber and nylon caster wheels, covering performance characteristics and selection criteria.
- Caster Maintenance Tips — Maximize the lifespan of your industrial casters with this comprehensive maintenance guide covering inspection, lubrication, and replacement.
Explore our complete range of heavy-duty casters (150-610kg) and super heavy-duty casters (700-1600kg), or contact our engineering team for expert guidance on selecting the perfect caster solution for your industrial application.
Post time: Jul-16-2024