
Pre-Installation Preparation: Tools, Measurements, and Selection
Tools You Will Need
Installing universal wheels (swivel casters) looks like a simple job, but rushing in without preparation is the fastest way to end up with a wobbly cart, a broken bolt, or a caster that rolls sideways. Before touching any hardware, gather the basics: an open-end or socket wrench matched to the bolt size, a Phillips and flat-head screwdriver, a tape measure, a marker, a center punch, a drill with the correct bit, a jack or safety stands to lift the equipment, and a small amount of thread-locking compound or lubricant. If you are removing old casters as well, add a can of penetrating rust remover and a hammer for tapping seized threads.
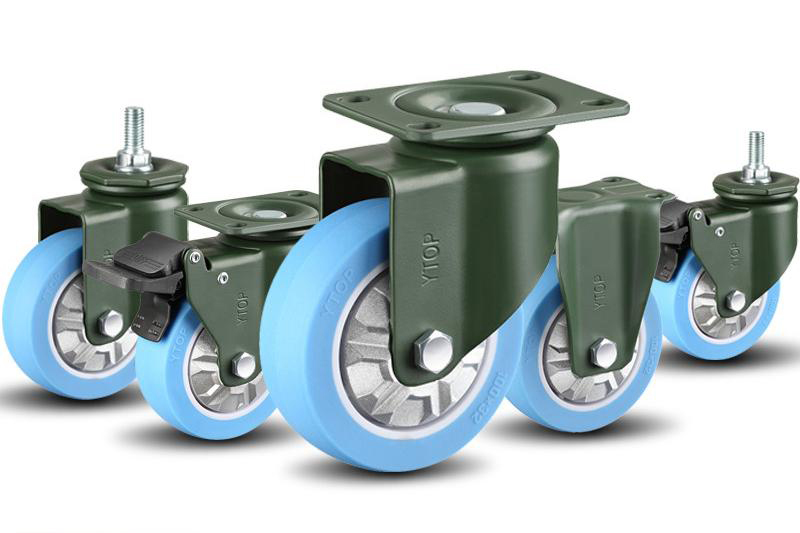
One preparatory habit saves hours later: take photos of the old caster layout, hole positions, and shim arrangement before you loosen anything. When you install the new wheels, those photos become your reference for orientation and shim placement.
Measuring and Confirming the Caster Model
Before drilling or bolting, confirm three things against the manufacturer’s drawing. First, the mounting pattern — the hole spacing and hole diameter on the top plate or stem — must match the frame or the pre-drilled holes you plan to use. Second, the rated load per caster must be sufficient: divide the total loaded weight of the equipment by the number of casters, and add a safety margin of at least 1.5 times that figure per wheel. Third, confirm the overall mounting height and swivel offset are what your application expects; a wrong caster height will make the cart tilt or interfere with adjacent equipment.
Do not skip this step. A universal wheel with a mismatched hole pattern or undersized load rating may appear to fit on day one, but it will bind, crack, or pull loose long before the wheel itself wears out.
Step-by-Step Universal Wheel Installation Guide
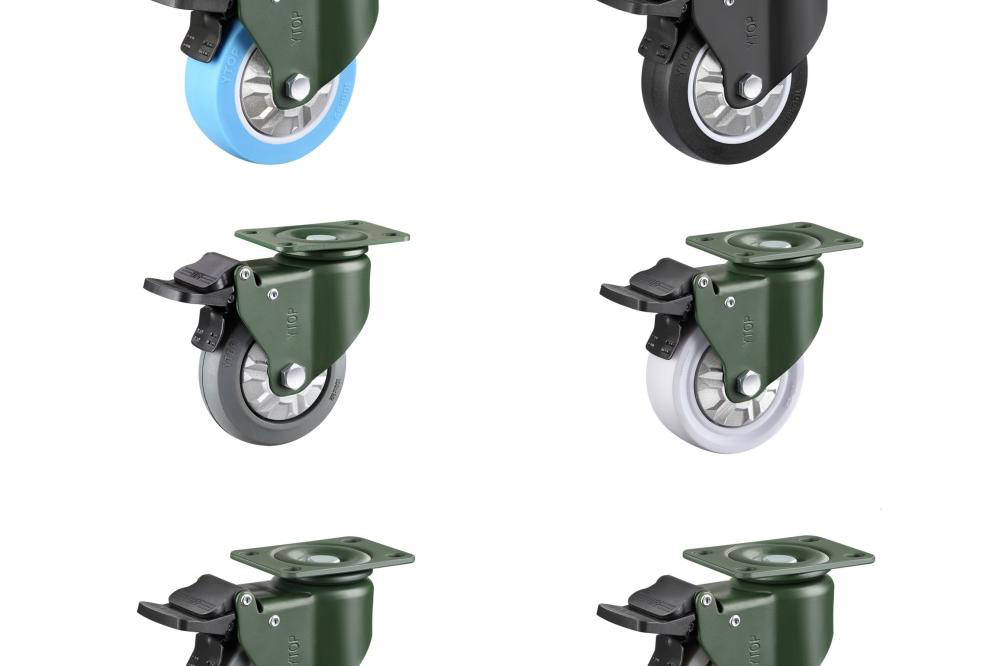
Marking, Drilling, and Securing the Bracket
Begin by lifting the equipment with a jack and supporting it on safety stands — never work under load, and never rely on a scissor jack alone. With the frame steady, position the caster top plate where the manufacturer’s layout requires. Mark the four hole centers through the plate’s mounting holes, then center-punch each mark to stop the drill bit from wandering. Drill the holes to the diameter specified for the bolts (usually slightly larger than the bolt shank for clearance, or exactly tapped if you are threading into the frame). Deburr the holes and brush away metal shavings before placing the caster.
Lower the caster onto the plate, insert the bolts, and run the nuts on by hand first. Once all bolts are started, tighten them diagonally in a crisscross pattern — not one corner fully then the next — so the plate seats flat against the frame instead of warping. Apply a small amount of medium-strength thread locker on the threads if the cart will see vibration or repeated impacts. For stem-type casters, tighten the lock nut evenly until the stem shoulders firmly against the frame; over-tightening can distort the bearing race.
Axle Alignment and Load Testing
After all casters are bolted on, lower the equipment off the stands and check that every caster touches the floor and the cart sits level. Spin each wheel by hand: it should rotate freely with no grinding, no side play, and no catching. Then push the cart across a flat floor at walking speed. It should track straight, swivel smoothly at the front, and not pull to one side. Finally, perform a light load test — place a representative load on the cart, roll it a few meters, and stop sharply. If the cart drifts, wobbles, or a caster squeals, stop and re-check the tightness and alignment before continuing.
Installation Precautions by Mounting Type
Plate-Type and Hollow-Kingpin (Hole-Top) Casters
Plate-mount (top-plate) casters are the most common industrial style. Their main installation pitfall is an uneven frame surface: rust, weld splatter, paint buildup, or old shim residue under the plate prevents full contact and causes the bracket to flex. Clean the mounting surface back to bare metal, use flat washers under every bolt head and nut, and never shim only one corner — that unbalances the load. For hollow-kingpin (hole-top) casters that bolt through a single central stem, verify the inner diameter of the mounting hole matches the stem and that a suitable washer distributes the clamping load across the frame sheet.
Threaded-Stem and Grip-Stem (Socket) Casters
Threaded-stem casters screw into a tapped hole or a nut plate under the frame. The rule here is to engage enough threads — at least 1.5 times the stem diameter — and to tighten the lock nut against the frame, not against the swivel head. If you are drilling a new hole, keep the drill perpendicular to the plate; a tilted threaded hole cross-threads the caster on installation. Grip-stem (push-in socket) casters are used mainly on light-duty furniture and racks: press the stem squarely into the socket until the retaining ring clicks into place, and confirm the caster does not pull out under a straight vertical pull before loading the cart.
Critical Installation Key Points
Keeping Axles Perpendicular and Load Ratings Intact
Two rules underpin every good universal-wheel installation. First, the swivel axis of every caster must stand perpendicular to the floor. A caster mounted on a tilted frame plate will “crab” sideways, wear its tread unevenly, and require far more push force than it should. Second, never modify the caster — do not weld on the bracket, do not grind the swivel race, do not drill extra holes in the fork, and do not swap in non-factory axles. Any of these changes destroys the heat treatment and the load rating, and is a common cause of sudden bracket failure under load.
Mixing Universal and Rigid Casters Correctly
A cart that uses only universal wheels tends to wander and is hard to push straight. The standard, stable arrangement is two universal (swivel) casters and two rigid (fixed) casters: the rigid pair set the direction at one end (usually the rear), and the universal pair steer at the other. On four-wheel industrial carts, the universal wheels are often mounted at the leading end, while on six-wheel heavy carts the middle pair swivels and the end pairs are rigid. Always follow the manufacturer’s layout plan for caster positions and quantities — mixing universal and rigid wheels randomly, or putting all four swivel, almost guarantees hard-to-push, drifting carts.
Special Environment Installation Notes
Outdoor, Coastal, and Corrosive Sites
Casters installed outdoors, near the sea, or in chemical wash-down areas need more than standard zinc plating. Use stainless-steel fasteners, or at minimum hot-dip galvanized and then powder-coated brackets, and apply anti-seize compound on the threads during assembly so that future removal is possible. Drill all mounting holes cleanly and touch up any bare metal with paint after installation — an untouched cut edge on a coastal frame will rust through within a season. Avoid reusing old fasteners in these environments; a single corroded bolt is enough to fail the whole caster group.
Extreme Temperature Conditions
If the cart will operate below about 5°C or above about 30°C on a daily basis, do not assume a standard caster will behave the same. Cold stiffens standard grease and can turn a smooth-rolling caster into a stiff one overnight; high temperature can melt greases and soften plastic wheel centers. Before installation, confirm with the supplier that the bearing grease, wheel material, and any brake pads are rated for your operating temperature range. In freezers, store and install the casters at room temperature before first use so that seals and bearings seat correctly; in hot areas, tighten fasteners once the cart has warmed up to operating temperature, because thermal expansion can loosen cold-torqued bolts.
Post-Installation Inspection and Debugging
The First-Roll Check
After installation, do not immediately put the cart into service. Walk it across a flat floor with no load, watching for any caster that does not swivel, any wheel that drags, and any squeak or chatter. A caster that skips sideways usually means the mounting plate is not flat, the swivel race is damaged, or the axle is tilted. A caster that squeals under roll usually needs lubrication at the race or a wrong wheel material for the floor. A cart that pulls consistently to one side often has a mismatched swivel direction, an improperly tightened bolt, or one caster whose mounting height is off.
Brake and Swivel Test
If the casters include brakes, press each brake pedal fully down and try to roll the cart: it should hold firmly on a flat floor. Release and confirm the wheel spins freely again. On total-lock brakes, verify that both the wheel and the swivel lock engage. Finally, check that all bolts are still tight after the first hour of use and again after the first week — vibration often loosens new fasteners before they settle.
Common Installation Errors and Troubleshooting
Errors That Cause Premature Failure
The most common installation mistakes are avoidable: using too few casters for the load, so each wheel is overloaded; mixing old and new casters of different diameters, which rocks the frame; over-tightening stem nuts, which crushes bearing seals; under-tightening plate bolts, which lets the bracket chatter and crack; mounting universal and rigid casters in the wrong positions, making the cart hard to steer; and drilling the wrong hole spacing, which forces the plate to sit skewed. If a newly installed cart drifts, pulls, or squeals, walk through these checks in order before blaming the caster itself.
Safety Operating Rules
Installation is a safety-critical task. Always lift and support the equipment on rated jack stands, not on makeshift blocks; never place hands under a lifted frame without a stand in place. Wear safety glasses when drilling, because metal swarf flies. Never install casters with visible cracks, bent forks, or damaged swivel races — reject them at receipt. After installation, label the cart with its load rating and brake/floor-brake usage instructions, and train the operators so they know how to lock, unlock, and push the cart safely. When in doubt about load, mounting pattern, or environment, ask the caster supplier before you drill: a ten-minute confirmation prevents a day of rework.
Frequently Asked Questions
How many universal wheels does a cart need?
A typical four-wheel cart uses two universal (swivel) wheels and two rigid wheels for stable, straight-line control. Four universal wheels make the cart steerable but hard to push straight; four rigid wheels roll only in one direction. Heavy six-wheel carts often use a swivel pair in the middle and rigid pairs at the ends. Always follow the manufacturer’s recommended layout for your model.
What size drill bit should I use for a top-plate caster?
Use the hole size stated on the caster’s installation drawing — usually a clearance hole slightly larger than the bolt shank, or a tapped hole if the frame is threaded. Do not over-drill, because oversized holes reduce the clamp force and allow the bracket to shift under load.
Can I mix old and new casters on the same cart?
It is not recommended. Casters on the same cart should match in wheel diameter, load rating, and swivel type. Mixed diameters make the frame sit unevenly and overload the shorter wheels; mixed wear levels make the cart pull or wander. Replace all four wheels together when they reach the end of their service life.
How tight should the mounting bolts be?
Tighten them diagonally in a crisscross pattern to the torque specified by the caster manufacturer, usually a snug, wrench-tight fit plus a final diagonal pass. Do not use an impact wrench on a standard caster bolt, as it can stretch the bolt or warp the plate. Recheck tightness after the first hour and first week of use.
Why does my newly installed cart pull to one side?
Common causes are a tilted mounting plate, a caster mounted backwards (universal and rigid swapped), uneven tightening, mismatched wheel diameters, or a swivel race that was damaged during installation. Check each caster for level mounting, correct orientation, and free swivel by hand before suspecting the floor.
Related Reading
- Removal and Installation of Universal Wheels: An Easy-to-Follow Guide
- What Is a Universal Wheel and Where Is It Mainly Used?
- In-Depth Understanding of the Structure of Casters
- What Are the Common Caster Specifications?
- Classification of Casters by Different Criteria
- Medium Duty Casters (100-190 kg)
- Light Duty Casters (35-80 kg)
- Contact Us for Universal Wheel Installation Support
Post time: Mar-12-2024