
Most caster failures on a plant floor are not sudden. They arrive through a sequence of small changes that nobody notices until a cart stops moving, a wheel locks, or a load ends up on the floor. By the time an operator reports a problem, the component that failed has usually been degrading for weeks.
An inspection programme catches those changes early, and it costs far less than the downtime it prevents. This guide sets out the twelve checkpoints we recommend for industrial caster fleets, what a healthy caster looks like at each one, and how to decide between adjusting, repairing and replacing.
Why Casters Fail Quietly
A caster is a small assembly carrying a large load in a hostile place, and it has no way to complain. Four failure modes account for most of what we are asked to diagnose.
Tread wear and flat-spotting. A wheel that is rolling wears evenly and slowly. A wheel that is dragged, or left loaded in one position for months, develops a flat spot. The flat spot then produces a thump on every revolution, which accelerates wear in the bearing and shakes fasteners loose.
Swivel stiffness. The raceway is the least visible part of the caster and usually the first to deteriorate. Dust, grit, water and a lack of grease all raise the force needed to turn. Operators compensate by pulling harder, which loads the fork and the mounting plate beyond their design case.
Bearing damage. Grit in a bearing starts as a slight roughness and ends as a seized wheel. In between there is a period where the wheel still turns but the bearing is no longer carrying load properly, and that period is when the tyre and the fork take the abuse.
Fastener and plate failure. Bolts work loose under vibration and impact long before the caster itself fails. A loose caster tilts, loads two corners of the plate instead of four, and cracks the plate or the deck beneath it.
Setting Up a 30-Minute Quarterly Inspection
The inspection does not need to be elaborate. It needs to be consistent, recorded, and short enough that it actually happens. Three things make that possible.
First, an asset register. Every cart, cabinet, rack and trolley gets a number, and the register records the caster model, wheel diameter, tread material and the date each was fitted. Without this, replacing a wheel becomes guesswork and reordering becomes a phone call to a supplier who has forgotten the original specification.
Second, a fixed route and a fixed order. Walk the same line every quarter, in the same sequence, and inspect the same number of units. Random spot checks find random problems and give no trend.
Third, a simple scoring sheet with three outcomes: pass, monitor, replace. Anything that is not a clear pass gets a date and an action, and the next inspection starts by checking whether that action was completed.
Thirty minutes is enough for a fleet of twenty to thirty units if the checks are done in the right order: wheels first, then swivel, then bearings, then the mount, then brakes.
Checkpoints 1 to 4: Wheels and Tread
1. Tread depth and shape. Compare the worn wheel with a new one of the same model. A measurable flat band, a visible flat spot, or a tread that has lost its crown all indicate replacement is close. A wheel worn to half its original tread is usually finished, because its diameter has changed enough to affect the cart’s behaviour.
2. Cracks and chunking. Look for cracks at the tread edge and for pieces missing from the tread face. Cracking at the sidewall of a PU wheel often means the wheel has been overloaded or exposed to a chemical it was not specified for.
3. Debris and embedded metal. Swarf, screws and wire embedded in a tread cause a thump, damage the floor and start cracks. Remove debris at inspection time; do not wait for the wheel to fail.
4. Wheel rotation. Lift the cart or tip it safely and spin each wheel by hand. It should turn freely and stop smoothly. A wheel that hesitates, grinds or wobbles is a bearing or axle problem, not a tread problem.
Checkpoints 5 to 8: Swivel, Bearings and Mounting
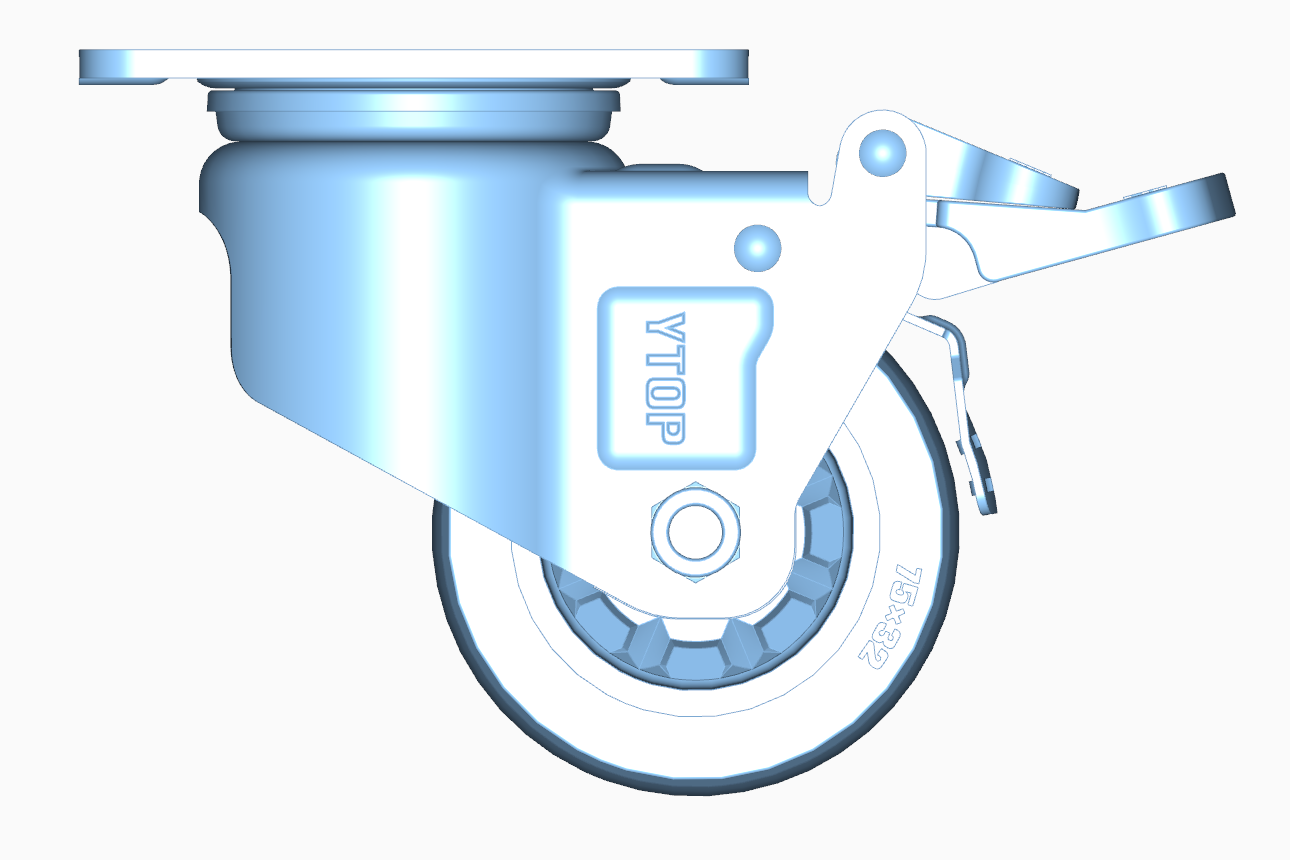
5. Swivel freedom. With the cart unloaded, push each swivel caster round by hand through a full turn. It should move smoothly with light resistance and no notchiness. A caster that turns stiffly, or that needs a shove to start, is telling you the raceway needs grease or has already been damaged.
6. Play at the swivel. Hold the fork and try to lift and tilt it. Visible vertical play means the raceway bearing is worn or the caster has lost preload. Play at this point produces the characteristic wobble that operators describe as a cart that will not track straight.
7. Bearing condition. Listen for roughness while spinning the wheel, and check the axle for play by rocking the wheel side to side. A slight roughness with no play can often be cured by cleaning and re-greasing where a nipple is fitted; roughness plus play means replacement.
8. Mounting plate and fasteners. Check every bolt for torque and look for movement marks around the plate. Cracked paint or a bright ring around a bolt head is evidence that the fastener has been moving. On plate-mounted casters, check for plate distortion and for cracking in the deck or frame beneath it.
Checkpoints 9 to 12: Brakes, Noise, Load and Route
9. Brake function. With the cart loaded, apply each brake and try to push the cart. A brake that holds the wheel but allows the swivel to rotate is a wheel-only brake doing its job; if the specification called for a total-lock brake, this is a non-conformance. Check that the pedal or lever returns fully and that the brake pad has not worn through.
10. Noise and vibration. Push the cart along a familiar route and listen. New noise at a particular floor location usually means debris, a flat spot or a failing bearing rather than a floor problem, and a hum that appears at speed points to bearing or raceway wear.
11. Floor marks and debris. Look at the floor where carts park. Black marks suggest a rubber or TPR tread being dragged; rust-coloured staining suggests a corroding wheel or a wet area; a trail of grit suggests a bearing that is leaking grease and collecting debris.
12. Load and route drift. Ask what the cart is carrying now compared with when the casters were specified. Loads grow, routes change, and a caster that was correctly sized for a 300 kg cart on smooth concrete may now be running at 450 kg across a threshold every hour. If the duty has changed, the specification needs to change with it.
What to Do With the Findings
Three outcomes are enough, and each maps to a different action.
Pass. Record the date and move on. A pass with a note of tread depth is more useful than a bare tick, because it gives you a wear rate for the next inspection.
Monitor. Anything that is worn but still serviceable gets a note, a photograph where possible, and a re-check date. Flat spots early in their life, a slightly stiff swivel after a wet period and a tread at 70 percent are all monitor items.
Replace. Cracks, visible play, seized bearings, brakes that do not hold, distorted plates and treads worn past half life should be replaced rather than repaired. Replacing one caster on a four-wheel cart is usually a false economy: the new wheel changes the effective diameter and the older three end up carrying uneven load, which shortens their life.
Where a fleet shows the same failure on multiple units, the inspection has done its most valuable job. Repeated flat spots point to parking habits; repeated seized swivels point to washdown or grit; repeated cracked plates point to an undersized plate for the load. Fixing the pattern is cheaper than replacing casters every year.
Spares and Records
Two records make the programme sustainable: a spare parts list and a replacement log.
Keep a small stock of the two or three caster models used most on site, at roughly five to ten percent of the fleet count. A cart out of service for a week because a single 100 mm PU caster has to be ordered costs more than holding spares.
The replacement log should record the date, the position on the cart, the reason for replacement and the hours or distance the unit had run. After a year it will tell you which positions fail first, which materials last in your environment, and whether the specification needs a change rather than another reorder.
If a pattern keeps recurring despite correct replacements, send us the log and a photograph of the failed caster; the failure pattern usually identifies the specification error more reliably than a visual inspection alone.
Related Reading
Two guides that cover the two failure modes most often found during inspection:
- Single Brake vs Dual Brake Casters: Safety Guide — what each brake type locks, and how to tell whether your fleet meets its specification.
- Why Caster Bearings Get Damaged: 5 Causes Explained — the bearing failure causes that show up as roughness and play.
Explore our heavy-duty casters (150-610kg) and super heavy-duty casters (700-1600kg) for fleet replacements, or contact our engineering team with your inspection findings for a specification review.
Post time: Nov-13-2026